Pages
▼
3.08.2011
BABY FOOD SPICE JARS tutorial
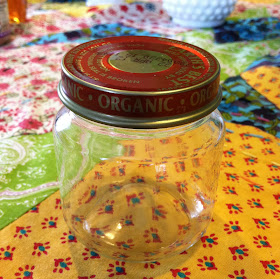
As promised, here are the finished spice jars in all their spicy glory. I may glue some magnets to make a magnetic spice rack, but I'm rather liking them as is. Hmmm. Want to make these yourself? I'll give you a hint. They are much easier to make if you have a BABY who eats FOOD. You got it. These are baby food jars. We should play guessing games more often because you are brilliant! Okay. Here we go.
MATERIALS:
-spices, likely in ugly mismatched jars
-as many baby food jars as your heart desires
-spray paint for the tops
-Goo Gone
-a labelmaker (or decorative masking tape, or little label stickers, or a paint pen)
STEP 1: Empty your baby food jars. I would hope this involves a hungry baby but I have heard of the baby food diet and if that's your jar-emptying method of choice, I don't judge. Okay, I do. A little.
STEP 2: Remove the labels and apply the Goo Gone to the sticky ickies left over. Kill a few minutes by reading this or cuddling your full-bellied babe while the Goo Gone goes to work. (This was my first time using Goo Gone. I am greatly intimidated by sticky ickies and the thought of using elbow grease, and didn't realize Goo Gone eliminates the need for my elbow to be greasy! I am now looking all over the house for sticky messes to clean up. True story.)
STEP 3: Take a cloth or paper towel and rub the goo off, then wash the jars and lids with soap and hot water. I'd also recommend running them through the dishwasher for some extra sanitizing- if you have a dishwasher. Here on Crooked Shmooked we don't discriminate the dishwasher impaired. I love you, sister! ;)
STEP 4: Go outside or find a well ventilated area and give your jar tops a nice coat of color. Only spray the tops and sides, not the underbelly. I used Rustoleum Painter's Touch Ultra Cover in Satin Granite. I only had to spray one coat for full coverage but use your own discretion and eyeballs to decide what looks good.
STEP 5: Crank out some labels with your labelmaker or stick sticker labels or tape on and use your best penmanship to write the spice names. I used a vintage Dymo labelmaker for my yellow labels and ran out of tape 4 spices short. Lovely. Gonna have some fun tracking down vintage labelmaker tape...
STEP 6: Once your lids are dry, empty your spices into their jars, screw on the lids and you are done! No more mismatched spice jars. Arrange the jars in a cabinet or spice rack where everyone can see your craftiness.
Yay for you!


So cute, I love them. Now I need to find something fun to make with my rice cereal boxes :)
ReplyDeletethanks for the shout out.... i only have red black and green dymo tape. sorry, no yellow. let me know if you want a roll.
ReplyDeleteI love the idea (and we sure go through a lot of baby food jars around here)! Did you have problems with your lids fitting on properly? Often when I recap a jar, the lid ends up all crooked and food spills out. Maybe I'm just buying the wrong kind of baby food;)
ReplyDeleteErin- ha! Yeah. I dunno about repurposing those.
ReplyDeleteJenn- I have some trouble getting them back on too but I am always able to get them straight after a couple tries.
Love the look! They turned out so well. Thank you for using Rust-Oleum on your project :)
ReplyDelete- Rust-Oleum Scott